
Hands‑on with Midjourney V8.1: 5x faster speed, native 2K output, and Draft Mode that generates 24 concepts at half the cost. But text rendering and character consistency remain weak spots. This guide covers Standard vs. Raw, Stylize/Weird/Variety tuning, and a full production workflow – all backed by real user reviews.
1. Why This Tutorial Exists
You know the drill: a client asks for “something premium.” You spend days browsing stock libraries, deliver three rounds of revisions, and still get a lukewarm response. Or it’s the night before a pitch and you need several distinct concept visuals – but sketching takes too long, 3D modeling is overkill, and stock photos never quite match your brief.
Midjourney solves the “idea‑to‑image” bottleneck.
With a simple text description, you get four high‑quality images in seconds. In the latest V8.1 release (default as of June 2026), standard generation takes about 4 seconds, and HD mode finishes in 12 seconds. For designers validating directions, content teams producing mood boards, or anyone who needs rapid visual prototypes, this tool dramatically cuts the time spent on early‑stage communication.
A crucial caveat: Midjourney excels as an inspiration engine and concept explorer – not as a final‑output machine. Most professional workflows treat AI‑generated images as a first pass, then refine them in Photoshop, Figma, or other design tools.
2. Core Concepts & Prerequisites
2.1 What Is Midjourney?
Midjourney is an AI image generator launched in July 2022 by David Holz (co‑founder of Leap Motion). You feed it a text prompt, and it returns four matching images.
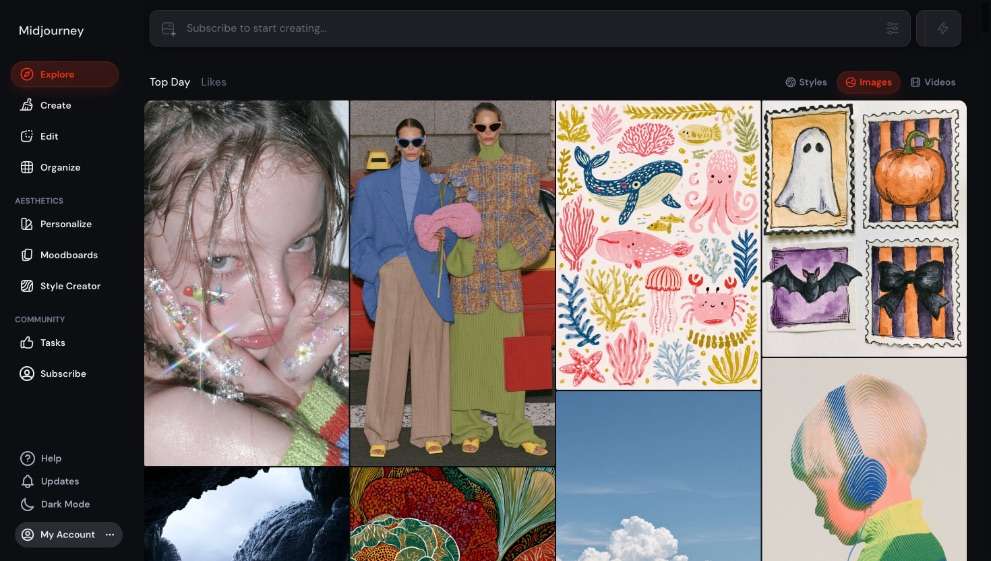
Key change in 2026: Midjourney is no longer a Discord‑only bot. You can now do everything – generating, editing, canvas management, and community browsing – directly at midjourney.com. Discord is optional.
2.2 What You’ll Need
| Item | Details |
|---|---|
| Account | Sign up at midjourney.com and choose a paid plan (no free tier) |
| Internet | Stable connection (access to overseas services required) |
| Language | Basic English for prompts (Chinese works but English is more reliable) |
| Budget | Starts at $10/month (annual billing available with 20% off) |
2.3 Version Snapshot (July 2026)
The current default model is V8.1, released on April 30, 2026 and made default on June 10. Compared to V7 and V8, V8.1 brings:
- 4–5× speed improvement – 4 seconds in standard mode
- Native 2K resolution – 4× the pixel count of V7 when using
--hd - Better text rendering (still imperfect)
- More precise prompt understanding – retains fine details
- HD mode – 3× faster and 3× cheaper than before
- Standard mode – 50% faster and 25% cheaper
Deprecation note: V8.0 Alpha will be retired soon. New users should start directly with V8.1.
3. Step‑by‑Step Guide
Step 1 – Sign Up & Choose a Plan
- Go to midjourney.com and click “Sign Up.”
- Select a subscription. All plans offer a 20% discount when billed annually – the table below shows both monthly and annual pricing, with features compared side‑by‑side.
| Feature | Basic | Standard | Pro | Mega |
|---|---|---|---|---|
| Monthly price (billed monthly) | $10 | $30 | $60 | $120 |
| Monthly equivalent (billed annually, 20% off) | $8 | $24 | $48 | $96 |
| Fast GPU quota | ~200 image jobs/month | 15 hours | 30 hours | 60 hours |
| Video generation | SD only | SD + HD | SD + HD | SD + HD |
| Simultaneous Fast image jobs | 3 | 3 | 12 | 12 |
| Simultaneous Fast video jobs | 1 | 3 | 6 | 12 |
| Relax mode | No | Unlimited image | Unlimited image + SD video | Unlimited image + SD video |
| Stealth mode | No | No | Yes | Yes |
| General commercial terms | Yes | Yes | Yes | Yes |
| Editor on uploaded images | Yes | Yes | Yes | Yes |
| Optional Fast hours top‑ups | Yes | Yes | Yes | Yes |
What each plan includes in plain English:
- Basic – best for light users testing the waters. You get a fixed number of image generations per month, SD video, and 3 concurrent image jobs. No Relax mode, no Stealth.
- Standard – the sweet spot for most individual creators. You get 15 Fast GPU hours, SD + HD video, unlimited Relax image generations, and 3 concurrent image + video jobs.
- Pro – for frequent commercial work. Double the Fast hours (30), 12 concurrent image jobs, 6 video jobs, unlimited Relax image + SD video, and Stealth mode (your images stay private).
- Mega – for teams and heavy usage. 60 Fast hours, 12 concurrent video jobs, and everything in Pro, with more headroom.

Step 2 – Understand the Interface
After logging in, you’ll see the web app. The main input box is at the top – type your prompt and hit Enter.
Key areas:
- Input box – where you write your prompt
- Generation grid – shows the 4 output images
- Action buttons – Upscale, Vary, Remix
- Settings panel – model version, style parameters, aspect ratio, etc.
Step 3 – Write Your First Prompt
Basic prompt structure:
[Subject] + [Environment/Scene] + [Style/Medium] + [Parameters]
Example:
text
/imagine prompt: A minimalist coffee shop interior, warm golden hour light, wooden tables, cinematic photography style --ar 16:9
Quick reference – common parameters:
| Parameter | Effect | Example |
|---|---|---|
--ar | Aspect ratio | --ar 16:9, --ar 1:1 |
--v | Model version | --v 8.1 (default) |
--hd | Native 2K high‑definition | --hd |
--s | Stylization (0–1000) | --s 500 |
--chaos | Randomness (0–100) | --chaos 50 |
--no | Exclude elements | --no text,logo |
--q | Quality (1–4) | --q 4 (enhances coherence) |
Step 4 – Generate and Iterate
- First run – wait 4–12 seconds for 4 images.
- Choose a direction – below each image you’ll find:
- Upscale – enlarge and add detail
- Vary – generate variants based on this image
- Remix – modify the prompt and regenerate
- Iterate – tweak your prompt and repeat until satisfied.
4. Deep Dive into Core Parameters
4.1 Standard vs. Raw Mode – Beauty or Fidelity?
This is one of the most underrated upgrades in V8.1. Raw mode dramatically reduces Midjourney’s default beautification, giving you a much more literal interpretation of your prompt.
What’s really happening: Every Midjourney version applies its own “style filter” on top of your prompt – cinematic lighting, dramatic shadows, stylised colour palettes. Raw mode turns off most of that layer. You describe it, you get it – plain and simple.
| Feature | Standard (default) | Raw (--raw) |
|---|---|---|
| Core idea | Adds Midjourney’s signature artistic flair | Minimises automatic beautification, follows prompt more literally |
| Prompt fidelity | May add unmentioned elements for effect | Sticks closely to what you wrote |
| Visual look | Strong “artistic” or “designed” feel | More realistic, photographic, natural |
| Best for | Quick, aesthetically polished images | Projects where precise control matters |
How to enable: add --raw to the end of your prompt, or switch the Mode toggle in the web settings panel.
Caution: Using
--stylizetogether with--style rawcan sometimes cause rendering conflicts. If you need high‑S values with realism, test without--rawfirst, then add it cautiously.
4.2 Stylize (--s) – Controlling Creative Freedom
--stylize (or --s) adjusts the balance between following your prompt exactly and letting the AI add its own artistic interpretation.
- Range: 0 to 1000, default = 100.
Three main zones:
| Range | Semantic Fidelity | Style Intensity | Typical Use Cases |
|---|---|---|---|
| Low (0–100) | Very high (>90%) | Weak, nearly photographic | Product shots, technical illustrations, UI layouts |
| Medium‑high (250–750) | Moderate (60–85%) | Noticeable, optimises lighting and materials | Commercial posters, cinematic portraits, atmospheric scenes |
| High (800–1000) | Low (<50%, may break structure) | Strong, may override prompt details | Experimental art, abstract concepts, idea exploration |
Version nuance: In V7, the sweet spot for realistic portraits was around --s 600. V8 introduces a Style Embedding Vector, making the same numeric value more influential – so for V8, many users start around --s 680 and tune from there.
Practical advice:
- For realism and precision, keep
--sbelow 100 and pair with--style raw. - For more artistic flair, try 400–750.
- If your prompt includes specific material instructions (e.g., “brushed aluminium”), keep
--sunder 400 to avoid losing that detail.
4.3 Weirdness (--w) – Exploring the Unconventional
--weird (or --w) is an experimental parameter that injects quirky, off‑beat, or non‑traditional aesthetics into your images.
- Range: 0 to 3000, default = 0.
- Higher values increase the “weird” factor – they can systematically weaken physical consistency, producing non‑Euclidean floating, zero‑gravity displacement, or liquid‑like morphing.
Practical advice:
- Start with 250 or 500.
- Above 1000, results become quite unpredictable.
- For a better chance of getting a “weird but good” image, try matching
--weirdand--stylizeat similar values (e.g.,--weird 500 --stylize 500).
4.4 Variety (Vary Functions) – Controlling Variation Strength
The Vary buttons control how much an image changes when you request a variant.
Vary (Subtle)– small, detail‑level tweaks. Use this when you’re almost satisfied and just need minor adjustments.Vary (Strong)– more significant changes in composition, elements, colour, etc., while keeping the main subject. Use this when you want to explore bold alternative directions.
Rule of thumb: Strong for exploration, Subtle for refinement.
5. Full Walkthrough – From Prompt to Final Asset
Scenario: Advertising Concept for a Premium Coffee Brand
Brief: Create a social media ad image for a seasonal autumn drink – “Osmanthus Latte.” It needs a warm, cosy feel, with the coffee and osmanthus flowers as heroes.
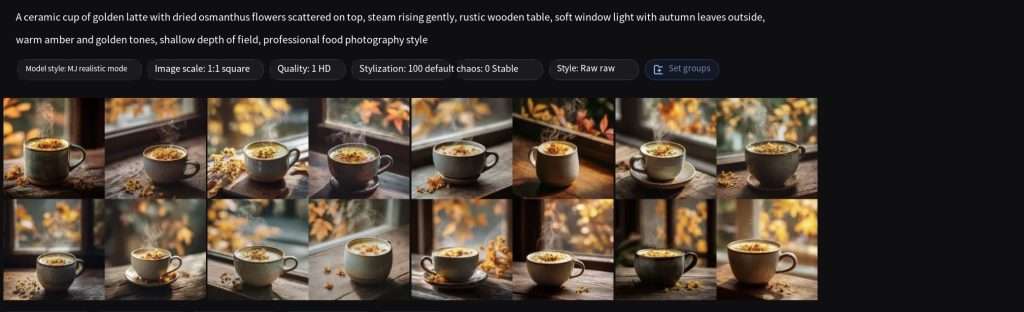
Step 1 – Draft the Prompt (Using Raw Mode for a More Photographic Look)
text
imagine prompt: A ceramic cup of golden latte with dried osmanthus flowers scattered on top, steam rising gently, rustic wooden table, soft window light with autumn leaves outside, warm amber and golden tones, shallow depth of field, professional food photography style --ar 1:1 --raw
Step 2 – Generate First Round & Tweak Stylize
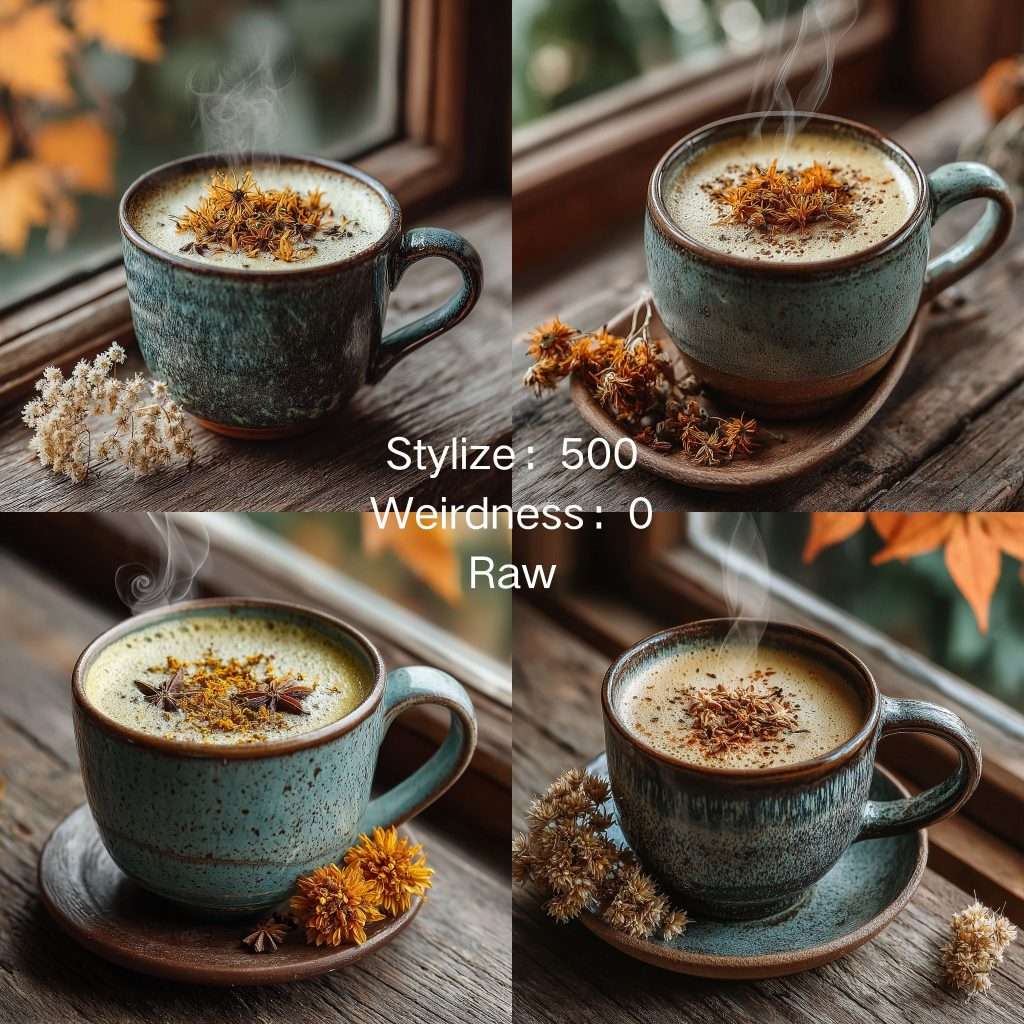
Start with --s 100 to get accurate product structure, then gradually increase to --s 500 to add atmosphere.


Step 3 – Rapid Iteration with Draft Mode
Turn on Draft Mode to generate multiple low‑res sketches at once – this helps you quickly judge composition and mood.
Step 4 – Final HD Output
Once you’ve chosen the final direction, add --hd to render a native 2K version.
Step 5 – Post‑Processing
Bring the AI output into Photoshop:
- Fix any minor artefacts
- Add the brand logo and typography
- Adjust colours to match brand guidelines
Total time: About 20–40 minutes from opening Midjourney to having a usable concept. The traditional route – sourcing stock, hiring a photographer, or commissioning an illustrator – would take hours or even days.
6. Real‑World Pros and Cons (July 2026)
✅ Strengths
- Image quality remains best‑in‑class – V7 scored 9/10 in visual quality benchmarks, and many reviewers call it the top AI image generator of 2026.
- Blazing speed – 4 seconds in standard mode, 12 seconds in HD.
- Raw mode gives you real control – you can dial back the default “Midjourney look.”
- Reference features –
--srefand--crefwork well in practice for consistent style and character across series.
❌ Weaknesses
- Text rendering is still problematic – V8.1 improves it, but critical text is often unusable.
- Character consistency requires skill – it works best with Midjourney‑generated reference images and fine‑tuned
--cwvalues. - Stylize tuning has a learning curve – optimal values vary across versions.
- No free tier – the entry price is $10/month (or $8/month with annual billing).
- Limited workflow integration – no official API, so automation and pipeline integration are difficult.
7. Real User Reviews (North America & Europe)
All quotes below are from public reviews, forum discussions, and independent tests published in 2026.
Review 1 – Brand Studio Lead (source: DEV Community, June 2026)
“Midjourney saves ‘communication costs,’ not ‘production costs.’ We rarely use the raw output directly. Our workflow is: Midjourney for concepts → Photoshop for polish → client sign‑off → final illustration by a human artist.”
Review 2 – Game Developer (source: SimilarLabs, February 2026)
During a test of fantasy art and concept design: “These are better than what some of our junior concept artists deliver on the first pass.”
Review 3 – Freelance Illustrator (source: zkxww.com cross‑review, July 2026)
“Midjourney V7 is widely recognised for its artistic and stylistic strength. For jobs that demand strong stylistic tension – brand key visuals, album covers, concept exploration – Midjourney is my top pick.”
Review 4 – Creatsy Team (source: Creatsy Blog, April 2026)
In a test covering 7 AI tools and 6 real product categories for mockups: “Midjourney v7 scored highest for visual quality (9/10) but lowest for workflow usability (2/10).”
Review 5 – Reddit Community Consensus (summarised by Cybernews, January 2026)
“Many users on forums and Reddit still note that Midjourney produces visually striking and stylistically rich images compared to other generators.”
8. FAQ
Q1: Standard vs. Raw – which should I use?
- Standard applies Midjourney’s default aesthetic polish. Raw turns most of that off. Choose Raw for realism and precision; choose Standard for a more artistic, finished look.
Q2: What --s (Stylize) value should I start with?
- 0–100 for product/technical work; 250–750 for posters and cinematic portraits; 800–1000 for experimental art. In V7, try around 600; in V8, start near 680.
Q3: What does --weird do?
- It introduces unconventional, off‑beat aesthetics. Range 0–3000; start around 250 or 500.
Q4: Vary (Subtle) vs. Vary (Strong) – what’s the difference?
- Subtle makes small refinements; Strong makes larger compositional changes. Use Subtle for polishing, Strong for exploring new directions.
Q5: How do --cref and --sref differ?
--cref(character reference) locks a specific character’s identity (face, hairstyle, clothing).--sref(style reference) transfers the visual style (colours, textures, lighting) from a reference image. You can combine both. (Note: in V7,--crefis replaced by--oref.)
Q6: Why does my character still look off even with --cref?
- The reference image must be a Midjourney‑generated, high‑res, front‑facing, single‑subject image. Also check your
--cw(character weight) – set it to 0 if you only want to keep the face and change clothes.
Q7: How do I use HD mode in V8.1?
- Add
--hdto your prompt. It outputs native 2K resolution without an extra upscale step. Note that HD tasks consume more GPU credits.
Q8: Is there a free plan?
- No. The cheapest option is the Basic plan at $10/month (or $8/month with annual billing).
Q9: Why do text elements always look wrong?
- Text rendering is a known weakness of diffusion models. Even with V8.1 improvements, avoid relying on Midjourney for final text – add it later in your design tool.
Q10: Can I use --stylize and --style raw together?
- Use with caution – they can conflict. If you need high S‑values with realism, test without
--rawfirst, then add it if needed.
Final Thoughts
In 2026, Midjourney remains the gold standard for “artistic quality” in AI image generation. V8.1 brings unprecedented speed and native 2K resolution, while Raw mode gives you finer control. Combining --sref and --cref opens up consistent series production. Yet it’s not a silver bullet – text rendering, character consistency, and workflow integration still leave room for improvement.
Best suited for:
- Designers who need rapid concept visuals
- Marketing teams producing large volumes of mood‑board material
- Creative professionals preparing pitches and storyboards
Less suited for:
- Projects that demand precise text and logos in the final image
- Long‑term campaigns requiring strict brand consistency across hundreds of assets
- Users with a very tight budget
The right mindset: treat Midjourney as an inspiration accelerator and communication bridge – not a one‑click production machine. Use it to explore directions and validate ideas early, then bring in your professional tools for finishing work. As one brand lead put it: “It saves communication costs, not production costs.”
If you want to read more articles about AI tools, feel free to follow my AI tool articles.